By Jame, Product Manager, Mapper Footwear | Last updated: September 2026
A full custom slipper project rarely fails because of one big mistake — it stalls because of small mismatches between parts that were each done correctly on their own. That’s what happened on an order we ran for a US buyer we’ll call Jude, who needed a fully custom slipper for a vintage-computer-themed exhibition: a raised keyboard design across the upper, three insole colors — deep green, sapphire blue, and burgundy — in a soft, premium-feeling EVA, and a thick, high-rebound non-slip outsole molded as one piece with the upper.
Every individual element came out right on its own — the kind of outcome that looks complete on a full custom slipper checklist. But the physical sample didn’t meet the comfort standard Jude expected once he actually wore it, and that gap only surfaced with a pair on his feet, not on a spec sheet. Here’s what happened, and what it says about how full custom OEM development actually works.
Why Was a Keyboard-Print Slipper Considered a Hard Design Brief?
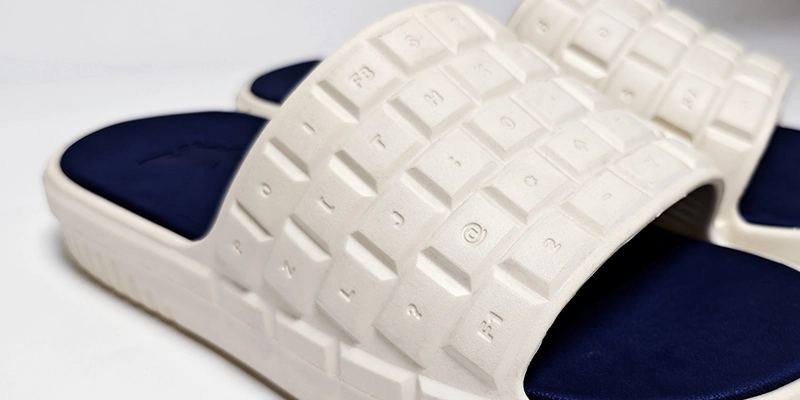
The upper design was the most technically demanding part of the brief, and also the part that went smoothest. Jude wanted the slipper’s upper to read clearly as a computer keyboard — individual keys, evenly spaced, with a raised, dimensional look rather than a flat printed pattern, and the letter on each key recessed and centered precisely on its own raised key face. Three things had to hold at once: even key spacing across a curved, three-dimensional upper without the layout drifting toward the edges; enough depth to make the keys read as raised, without making the upper stiff or bulky; and mold precision tight enough that every recessed letter actually sits centered on its key, not just close to it.
We started with 3D modeling before touching any tooling. Jude reviewed the digital rendering and approved the keyboard layout early — his main concern at that stage wasn’t the design itself, it was whether a screen render would actually translate into the same result in a physical mold. That’s a fair thing to worry about on any full custom slipper project. A lot of full custom OEM sourcing goes wrong exactly there, when a buyer signs off on a 3D render and assumes the physical result will match it automatically. It usually does, if the mold work is precise — but “usually” isn’t something you want to find out after the mold is already cut.
Why Does a Full Custom OEM Order Start With a Wooden Mold, Not the Final Tool?
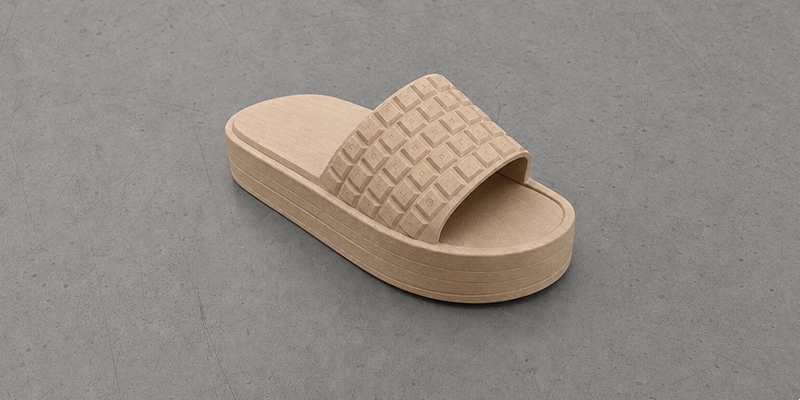
We built a physical wooden mold before committing to the production tooling, and this is the step most buyers underestimate on a full custom slipper order. The wooden mold is where a design moves from a 2D rendering to something you can hold, photograph from every angle, and evaluate the way you’d evaluate the actual product — without the cost or lead time of cutting final tooling first. For Jude’s order, this step covered the shoe’s overall shape and standard sizing, the outsole’s non-slip tread pattern, and the sizing and logo placement details.
We sent Jude photos and walked him through the first wooden mold on a video call. He was satisfied with the keyboard layout carrying over from the render, which answered his earlier concern directly. But he wanted the shoe’s silhouette to read with more of an athletic curve, and asked for a small adjustment to the outsole’s tread pattern — both minor changes, but both meant going back into the mold. We produced a second wooden mold with those adjustments. Jude approved it. That stage — from first mold to final approval — took about three weeks.
This is the part of full custom slipper development that’s easy to compress and expensive to skip. Buyers under time pressure sometimes want to move straight from a digital render to the final production mold to save two or three weeks. We don’t recommend that, and this order is a reasonable example of why: the curve adjustment Jude asked for was a five-minute conversation and a minor tooling revision at the wooden mold stage. The same change requested after final tooling was cut would mean reworking a completed mold instead of adjusting a working draft — a materially different cost and timeline, not a small one.
How Do You Match an Exact Pantone Color in EVA Foam?
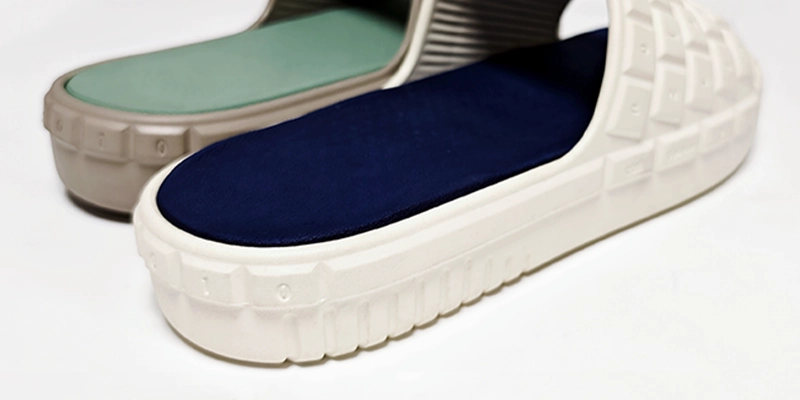
Color matching in molded EVA is genuinely harder than most buyers expect, and it’s rarely about the Pantone reference itself. For the insole, we selected a premium-grade EVA based on what our higher-end product lines have used successfully — to save time, we shared the finished material’s Shore hardness range and environmental compliance data with Jude over video rather than shipping a physical swatch first. He reviewed the numbers, was comfortable with the material, and we moved forward on that basis.
The color was a different story, and it’s one of the most common friction points in any full custom slipper color brief. Jude supplied Pantone references for all three shades — deep green, sapphire blue, and burgundy. EVA color is achieved through compound mixing, not surface dyeing, and the finished molded result consistently reads slightly differently than the flat Pantone chip, even when the formulation targets the reference exactly. This isn’t a defect in the process — it’s a property of how pigment behaves once it’s mixed through a foam compound and pressed under heat, versus how the same pigment looks printed flat on coated paper under a light box.
We ran multiple color iterations, photographing and video-reviewing each round against the reference with Jude until the base color landed where he wanted it. Once the hue was right, a second issue showed up: the finish had too much sheen for what Jude was picturing. He wanted a low-key, matte look, and what we’d produced read as glossier than that — higher shine reads as less premium on a product like this, not more, which is a detail a lot of buyers get backward until they see it side by side.
Getting from glossy to a clean matte finish without the material looking cheap or the color going flat is a genuinely technical adjustment, not a simple settings change. Push the matting process too far in the wrong direction and you get a surface that looks chalky or uneven instead of premium — the opposite of what the buyer is asking for.
We adjusted the base compound formulation, the mold surface treatment, and the release agent together, rather than changing just one variable, and got a matte finish that held the color depth Jude wanted. Between the mold work covered above and this round of color and finish adjustments, we were a little over a month into the project by the time the insole reached final approval.
Why Did a Sample With No Individual Defects Still Fall Short of Approval?
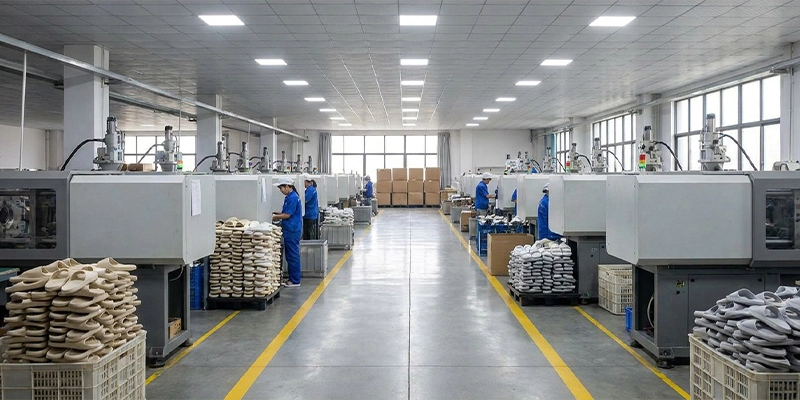
With the wooden mold approved and the insole color and finish signed off, we combined the finished insole and outsole into a complete physical sample and shipped it to Jude — his first chance to actually wear the design, not just review it on a screen or match a swatch on a video call. Every individual component of the sample checked out on its own, but Jude still wasn’t ready to sign off for bulk production once he had the pair on his feet. The keyboard upper looked exactly like the approved render. The insole color and matte finish matched what he’d signed off on. The silhouette and tread pattern matched the second wooden mold. On paper, everything checked out.
But when Jude wore the physical sample, he felt a gap between the insole and the outsole — noticeable when pressing down with the ball of the foot, and made more obvious rather than less by how soft the insole itself was. It wasn’t a defect that would fail a standard QC inspection; it was a comfort standard specific to what Jude wanted his customers to feel.
This is the kind of issue that’s genuinely hard to catch before physical sampling on a full custom slipper order, and it’s worth explaining why. On a standard slipper, the cushioned footbed and the non-slip outsole are usually molded as a single piece — there’s no seam or interface to manage because they’re one part.
Jude’s brief called for something different: a separately designed insole (for the specific colors and matte finish) paired with an integrated upper-and-outsole unit. That’s a legitimate design approach, and each half performed well on its own. But separating a component that’s normally one-piece introduces a fit interface between two parts that wasn’t there in the original engineering — and if that interface isn’t tuned precisely, you get exactly the kind of gap Jude felt underfoot, amplified by a soft insole material that transmits pressure changes more noticeably than a firmer one would.
We rebuilt the insole geometry specifically to seat against the outsole more precisely, rather than adjusting either component in isolation. Once the fit was corrected, we sent a new round of samples. This time, when Jude put the pair on and walked around his studio, the gap he’d felt before simply wasn’t there — the insole and outsole moved as one piece under his foot, the way he’d pictured it back when this was still a 3D rendering on his screen. For the first time since the project started, what he was standing in matched what he’d been imagining for months. He approved the samples without asking for a single further change and told us to move straight to bulk production.
What Does This Kind of Sample Revision Actually Mean for Your Timeline?
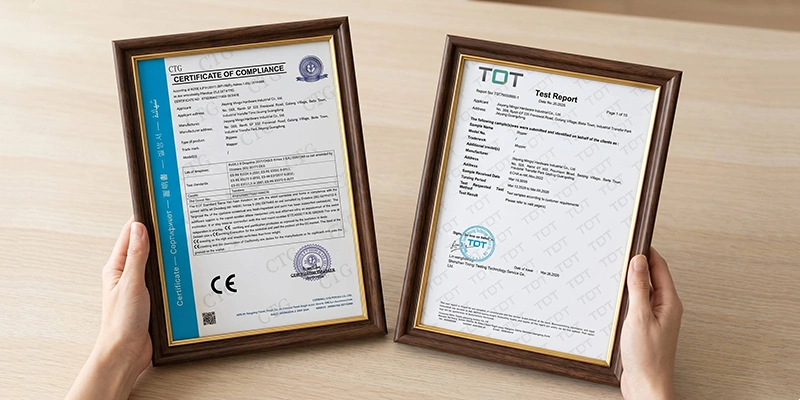
From first inquiry to Jude receiving 12,000 finished pairs took three to four months — and the revision cycles described above are a normal part of that timeline for a project this custom, not a sign that something went wrong.
A brief this specific — a design with no close precedent on the market, three exact colors in a foam material, and a footbed engineered separately from the outsole — was never going to move through sampling in a single pass. What matters for a buyer evaluating a supplier isn’t whether revisions happen. On a genuinely novel design, they almost always will. What matters is whether the supplier catches the mismatch before bulk production, explains clearly why it happened, and fixes the actual cause instead of masking the symptom.
If you’re planning a full custom OEM project with a design this specific, budget real time for the mold and color-matching stages, and ask your supplier directly how they handle a sample that looks right in every individual component but doesn’t perform right as a finished product. That question tells you more about a supplier’s full custom slipper process than any spec sheet will. For a broader look at what the full custom OEM path looks like end to end — inquiry through container loading — our step-by-step breakdown of what happens after you contact a slipper factory covers each stage in more depth, including realistic mold costs and lead times for orders like this one.
Jude made it to his exhibition with the finished pairs in hand, and the keyboard slippers have stayed in his product line since. If you’re weighing whether your own concept is realistic for full custom slipper development, Mapper Footwear’s custom slipper and OEM programs are built around exactly this kind of design-first conversation — we’ll tell you upfront where the technical risk sits before you commit to tooling.
Final Thoughts
A full custom slipper order is not a single decision — it’s a sequence of individually correct decisions that need to be checked against each other before bulk production, not just checked against the brief. Wooden mold review, color-and-finish approval, and a physical wear test of the finished component assembly each catch a different category of problem. Skipping any one of them doesn’t save time; it just moves the discovery of the problem later, to a stage where fixing it costs more.
If you already know your design is unconventional — a departure from a standard shoe structure, an exact multi-color match, or a first-of-its-kind concept — tell your supplier that at the inquiry stage, not after the first sample ships. It changes how much buffer they should build into your sampling timeline before you ever see the first prototype.
About the author: Jame is a Product Manager at Mapper Footwear (Jieyang, Guangdong, China), a factory-direct slipper manufacturer with 60+ staff and daily capacity of 10,000 pairs across EVA slippers, PVC flip-flops, warm slippers, and garden shoes. Mapper Footwear holds CA65, EU REACH, and EU RoHS certifications, and supports both light customization (MOQ 20 pairs) and full OEM programs (MOQ 500 pairs). Learn more at mappershoe.com.
Follow us on Instagram, TikTok, and YouTube to see our production floor before you inquire.